Searching Z8RC.com for the best match.........

Monday, July 30, 2012

Parkzone Albatros D.Va WWI BNF - Build and Flight Review

Some might not notice, but with very few exceptions the airplanes that I review all have one thing in common: they are classics.  This build and flight review is no exception...

flying_thumb2
SPECS
-
Wingspan: 42.3 in
- Overall Length: 35.0 in
- Flying Weight: 43.4 oz
- Motor Size: 480-size 960Kv Brushless
- Servos: 4 digital servos (installed)
- Prop Size: 10 x 8 (included)
- Speed Control : 30-Amp Pro Switch-Mode BEC
- Recommended Battery: 3S 1800mAh 11.1V LiPo (included)

FEATURES
- Construction: EPO

REQUIRES
- Radio:  4 channel 

PAID
$340 MSRP
$249.99 Street
+ $20 tax
= $270

PLANNED UPGRADES
- None

ON THE GROUND


IN THE AIR


GRADES

Thursday, July 26, 2012

Video Reviewer Suffers Crash After a Typical DSM-X Brownout

Horizon Hobby forced their user base to buy all-new radio equipment when they switched to DSM-X from their admittedly shoddy DSM-2 standard. 

Spektrum and JR brand DSM-X receivers with “QuickConnect” were supposed to limit the number of crashes caused by receiver reboots in the air.  Why there is a need for a receiver to reboot in the air remains an unanswered question.  DSM-X was also supposed to fix routine frequency conflicts causing crashes when more than a few radios are operating.

It didn’t work. 

Brownout-induced crashes continue as “a fact of life” for those who have been slow to switch from DSM to a more modern 2.4 standard.

DSM-X Brownout and Crash at 4:30 mark.

In typical European business model fashion, Spektrum/JR engineers lay 100% of the blame on their customers:

“The #1 problem encountered by DSM fliers: inadequate power supply. Unlike PCM, where servos get "crunchy" at voltages as low as 2.5 volts, the digital system used in DSM shuts down at 3.2 volts. 99% of fliers have no problem, but when you do, it's a toughie. New QuickConnect software allows restoration of your radio link the instant voltage is restored.” 

They consider themselves the customers’ savior, by offering “QuickConnect” to patch their own critically unsafe design flaw (but only if the bus voltage magically rises, fixing the root problem on its own). 

For those unfamiliar with Horizon Hobby’s defunct receiver design, power from an e-powered motor battery flows in the following order of precedence:

   1. To the motor(s)
   2. To the servos and electric accessory bus
   3. To the radio receiver
 

Using a modern receiver design, such as Hitec SPC, the priority for e-power goes:

   1. To the radio receiver 
   2. To the motor(s)

  
3. To the servos and electric accessories

Using only leftover servo bus power as the sole source of receiver power is an obviously inept design paradigm left over from the days when dedicated receiver packs, grafted into the servo bus, were the only source of electric power in an RC aircraft.  

News Flash!  Today we have big things called motor batteries.

e-Powered planes and helicopters, in particular, have a very current draw so it isn’t surprising that any components downstream from the motor will often get shortchanged.  Thus e-powered DSM models tend to crash, a lot.  Additionally, a stuck servo or electric accessory like a landing gear, or even a fried motor or a bad dedicated BEC can cause servo bus power to fall below the 3.2 Volts required for DSM receivers to stay awake, causing a certain catastrophic crash. 

Despite numerous bandaid releases, like QuickConnect, Spektrum engineers still fail to recognize the root cause of their problem:  an unrecognized and erroneous assumption that a dedicated receiver pack remains the only form of power in an electric airplane today, and the corresponding false requirement to power the radio receiver from the servo bus instead of directly from the higher power motor battery. 

In other words, the crash in the video was caused by low intellect. 

I suppose electric planes with high powered motor batteries are so new that Horizon Hobby engineers haven’t had a chance to analyze them.  Until they figure out e-power, avoid dangerous DSMX radios.

Sunday, July 22, 2012

The Overhead Pattern

Continuing and ending my mini-series on how to land, this article focuses on flying a good traffic pattern: the military Overhead.

sqpdaau3

The Overhead Pattern is better than a civilian box pattern for a multitude of reasons, the most important reason directly applies to RC flying: all pattern references are based directly off of the runway. 

In a civil box pattern, references are derived from the particular geography surrounding the field.  A house with a red roof might define the downwind ground track, then turn at the water tower, follow the river jog, etc.    That is because civilians can become intimately familiar with their home drome, but military pilots must be able to land consistently on any runway the world has to offer on the first attempt. 

Another reason the civil box is different is the possibility of positive control versus the certainty of passive control.  Positive control means some entity other than the aircraft may determine pattern priorities.  Passive control means aircraft resolve their own conflicts without any the need for audio communication, only visual comm is required to sequence the pattern safely.

RC flying only allows the pilot a runway-based perspective, so the military Overhead is the perfect pattern to fly.

The second reason the military overhead could also apply to RC, depending on one’s circumstances: it is tight.  The reason the pattern needs to be tight is forward operating base airfield defense. 

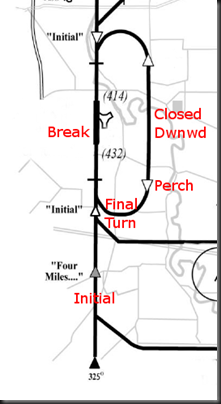
Military airfields are primary targets, and defending a lot of ground is difficult.  The tighter the pattern is to the landing strip, the less area there is to defend.  Aircraft make their Initial approach the field at the speed of heat to make potshots difficult, then enter a 180 degree break turn, called the “Break” for short, then fly a tight downwind leg called “Inside (or Closed) Downwind” past a Perch point and into a Final Turn onto Final to land. 

IFGOHDLabeled

Taking the (underlined) pattern legs one at a time and in order:

Initial – An “initial” approach to the field that is aligned with the landing runway and landing direction (usually up wind).  Initial is anywhere from 2 to 20+ miles long and from 1000’ AGL to several thousand feet in the air.  In combat, it isn’t unusual to approach the field between 500-600 knots.

The Break Point – As you approach the airfield on Initial, the Break point is the point above your intended touchdown point directly above the runway.  In air-to-air lingo, a “break turn” is defined as your quickest tightest turn usually performed in idle while dispensing chaff and flares.  Idle power let’s you cash in airspeed chips for min radius, assuming you start above your airplane’s corner velocity.   Idle power also cools the plane to minimize any IR signature you might present to heat seekers.  The same consideration applies to the pattern break point; manpads are everywhere.

If you are going to be too close to another aircraft on Inside or Closed Downwind, do not Break.  Carry straight through the Break Point then resume VFR navigation to re-establish yourself on Initial.  Rinse and repeat until you have a safe opportunity to Break.

The declining turn radius of your fast airspeed from Initial to a slower airspeed rolling out on Inside or Closed Downwind defines your lateral displacement from the runway.  Your faster, larger radius Break Turn provides the right lateral displacement from the runway for a slower Final Turn, along with some margin for error.

Inside or Closed Downwind – Typically displaced less than a mile from the runway.  Landing gear must come down before the Perch Point, with flaps generally tracking to an intermediate position.  Closed Downwind is the ideal time to trim the airplane up for a slower airspeed, assess the winds and apply crab to maintain ground track. 

This pattern leg is called “Closed Downwind” when you arrive from the “Closed Pull-Up” following a touch and go, while it is called “Inside Downwind” when arriving from Initial via a Break.

The Perch Point – A point that defines the end of Closed Downwind and the beginning of the Final Turn.  On a no-wind day, the Perch Point is exactly even with your intended roll-out point on Final, that is, the point that ends your Final Turn and starts Final.  The Perch is the last point flown at pattern altitude; it is all down hill from there.

Final Turn – A 180 degree descending turn to Final.   The Final Turn is the first time to start considering your runway aimpoint.  Although your flight path is not pointed directly at your Aimpoint until completion of the Final Turn, your altitude trend generally points at your Aimpoint from the Perch Point downward.

Fly an airspeed that is fast enough to turn while configured for landing.  If you feel a stall developing, roll out to wings level, apply full power and climb straight ahead disregarding any pattern ground track.

Final – A short approach to land.  Approaching wings level, slow down immediately to establish your final approach speed.  Set the throttle and trim the plane up so it flies toward Aimpoint 1, hands-off.

Note that landing is generally assured once the airplane is established on Initial, even if you lose the engine(s).  On long initial, engine-out, consider a straight-in.

Saturday, July 21, 2012

How to Land

Update 7.24/2012:  Also see The Overhead Pattern


It struck me recently, while listening to someone try to explain how to land to another guy, that very few people flying RC today actually know how to land.  Most just sort of figure it out.  That’s fine when it works, but watching the attempts that followed made it clear that relearning all the hard mistakes of the past usually doesn’t work.

I don’t claim to be the best RC lander in the world.  My videos regularly prove otherwise.  But just because you must continually work to perfect something doesn’t mean there is not a right way to do it.  With 25,000 USAF landings under my belt mostly as an IP, and no crutches to show for it, I hope I’ve learned something transferable to others.  But I’m open to the idea that isn’t true, especially as it applies to RC land.  But here goes nothin’…
sqpdaau3

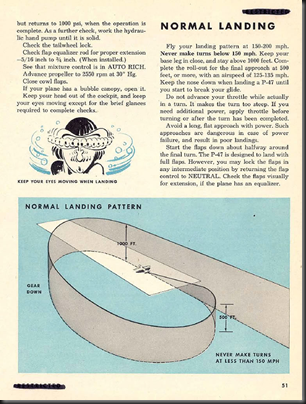
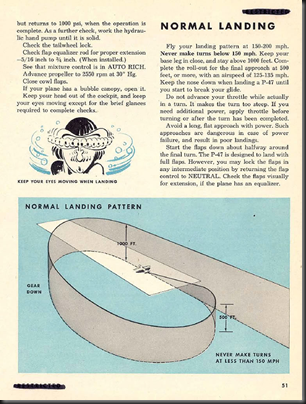
The Military Overhead Pattern hasn’t changed since this USAAF P-47 Flight Manual was written, and probably long before that.  I’ll explain how to fly the military Overhead Pattern in an up coming post since it is ideal for RC flying.

Like most things flying, landing is a both a science and an art form, but without first understanding the scientific piece, the artist will endlessly struggle to find the right medium to consistently make money.

So here is the science piece, figure out the art part yourself.

And like many things science, there is often more than one valid solution.  The solution I’ll present today is the one taught by the world’s leading authority on flying, the USAF.  Period.  There are probably other solid methods to land a plane consistently and properly, but I’ve never seen or heard of one that worked. 
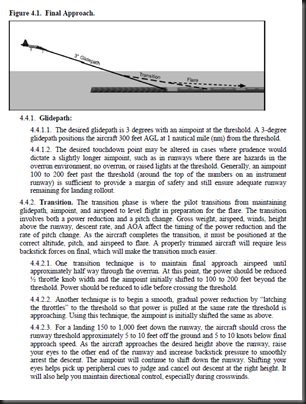
FinalApp

So let’s start with the end in mind.  The primary goal is to land on speed.  Not to land as slow as possible, and not to land one knot hot.  The wheels should hit dirt at exactly the particular airplane’s optimum landing speed for it’s given configuration and weight.  Second is to land in the proper place, usually about 750 feet beyond the runway threshold for a Fighter type aircraft, in the middle or if in strong cross winds, biased to the upwind side.  Third is to walk away without a (permanent) limp.

In RC terms, landing on speed just means touching down at the airplane’s stall speed plus some predetermined margin for error.  Since most RC planes have no airspeed needle, we are forced to estimate our degree of success.  But that doesn’t mean anything goes, either.

The “science” piece of touchdown speed is the airplane’s stall speed.  Let’s say [V(touch down) = V(stall) x 1.2] as a reasonable goal. 

To figure what that looks and feels like from an outside view, fly a couple of mistakes high and simulate a landing approach.  Stabilize at some airspeed in your landing config (flaps and gear included).  Then incrementally reduce power, restabilize, reduce, restabilize.  Rinse and repeat until the aircraft is on the razor’s edge of falling off—indicated by a dropping of the nose and/or a wing.  Note the throttle setting for stabilized level flight when exactly at stall speed, level. 

Now add some throttle until you see a flight picture with some margin of error that you can comfortably control, that airspeed might be something like 120% of your ragged edge stall speed. 

Take a mental movie of that airspeed.  Also remember where the throttle resides to achieve that stabilized airspeed in level flight.  During the actual landing, you’ll be rounding out from some stabilized glidepath, so the throttle will not need to find to that position unless you round out too high and must actually stabilize in near level flight.  At that point, you need to be at least that throttle setting until the airplane resettles, or you decide go around and set it up again

Backing up from there, your approach speed must be faster still.  That allows some increased degree of maneuverability to fight winds and stick actuator errors to stay lined up.  Add another 30% or so, and your approach speed might be about 150% of your ragged edge stall speed.

Armed with an idea of what speeds we are trying to fly, let’s apply a basic landing technique. 

First, we set up a final approach.  I’ll be writing another blog article on how to fly a proper pattern, so everything pre-final will have to wait til later.  Let’s say the airplane magically appears on final for now.

So… how far away from the touch down point should the final approach begin?  There are a few full scale considerations that might also apply to RC: 

Number one, is power loss.  If you lose a motor at any time on final, ideally you should be steep enough to still make the beginning of the runway, even if you land shorter than your intended touch down point.

Two, is brevity.  There are all sorts of reasons to minimize your time on final, that is, slow and low to the ground.  One of the best reasons is the proliferation of manpads.  Or, in RC terms, the angry farmer with a shotgun. 

Three, is visibility.  You have to be able to clearly see the landing picture from the cockpit, or in RC terms, you have to clearly see what your plane is doing.

Four, is time.  You need enough time on final to make an adjustment or two, then get settled onto a stable glide path.

Repeatable, great landings always start with a stable picture on final.  As an absolute minimum, you must be stabilized—which means on your approach speed, on the proper glidlepath angle, with the throttle set (not moving), and trimmed up to fly mostly hands off--before the round-out begins.

What does a proper glidepath look like?  Every airplane is different, and every day is different based primarily on the winds.  But the basics are the same.  In your landing configuration (landing flaps/slat & gear down), glide power off and note the angle.  If that angle were to continue power-off, you should still make some sort of landable surface.  Now add a little power for cushion, this will be something less than your level flight approach speed power setting as determined above.  Let’s guess, 15% throttle for the sake of illustration.  The resulting, stabilized power-on glide path is the one to photograph in your mind and practice.
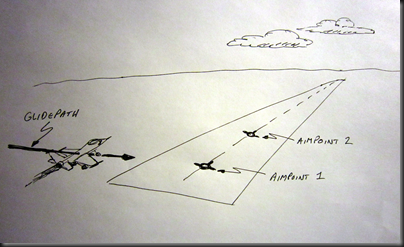
ampoints
Where does this glidepath exist in space?  It must extend from a point on the ground, called your Aimpoint.  You Aimpoint is the spot on mother Earth you try to hit, in a game of aerial chicken.  In a Fighter, flying down your intended glidepath to your intended Aimpoint is easy, you steer your HUD’s flight path marker (a magic dot extending your actual flight path as determined by your INS) over that spot on the ground, then look at the glide angle it gives you.  If you are steep, aim short for a few seconds then come back to it, and vice versa.  In a non-HUD airplane you have to look outside and visually assess the point the airplane would crash if it kept going, then steer your flight path so that is the proper spot on the ground.

In the RC world, it is even easier, because you can see exactly where the plane is heading.  Simply start down on your glide path when your desired Aimpoint is is the logical extension of that glide path.  In the shifting aimpoint method, this initial Aimpoint is Aimpoint 1.

Typically, Aimpoint 1 is somewhere between 500 feet short of the runway threshold (for Generation 2 jets like an F-104) to 1/3 of the way down the runway (forced landing in a single motor prop job).

For RC, Aimpoint 1 is some comfortable distance beyond the runway threshold, so if you lost your motor, the resulting steeper power-off glidepath would reestablish Aimpoint 1 on the runway threshold.  If you chose to fly final in a poweroff glide, then Aimpoint 1 could certainly be on the runway threshold given a deliberate decision to accept no margin for error—at least while the throttle stays in idle.

Once established stabilized on final, which means desired power-in, airspeed steady, glidepath set, and trimmed-up so that state won’t change hands-off, the goal is to do as little as possible until you begin to approach Aimpoint 1.  Now we begin the Round-out.  The Roundout starts with enough time to comfortably cut your initial glidepath angle at least in half.  That generally equates to initiating the round out at a few wingspans of altitude before actually impacting Aimpoint 1.

Many beginning pilots make the mistake of setting Aimpoint 1 only to Roundout into level flight, or they might even balloon back up into a slight climb.  I call that the Zen method of landing, because the right amount of Roundout is divined by meditation and a dose of Eastern Mysticism.

The proper Round-out is not round at all, it is a deliberate redirection of glidepath from Aimpoint 1 to a new Aimpoint 2.

A decent illustration that I dug out of youtube.  This glidepath is too shallow, if he lost the engine toward the beginning of the video clip he’d be forced to land short.

Aimpoint 2 is roughly your intended touchdown point.  Unlike Aimpoint 1, If you actually hit Aimpoint 2 you will have accomplished a well controlled, on-speed landing. 

To avoid ballooning during the roundout, keep the airplane pointed at Aimpoint 2 and gently reduce the throttle to idle at about the same rate you change your glidepath from Aimpoint 1 to 2

Add a little extra flare for style points and to hold the aircraft off until it is exactly on-speed for landing.

Friday, July 20, 2012

BlitzRCWorks Mini F-22 Raptor

Update 8/30/2012:  See http://z8rc.blogspot.com/2012/08/aeo-rc-50mm-ducted-fan-combo-w5800kv.html for a great fan upgrade (and noise reduction) that combines the trust of 4S with the lighter battery weight and balance of 3S. 


Update 7/20/2012:  4S testing is complete with exceptionally strong EDF thrust, even when capped by computer at 20 Amps.  I flew two 1000 mAh batteries.  The first lasted 5:00 mins-even, with plenty left for landing.  The second I flew to exhaustion at 6:35 minutes after a lot of relatively low power setting, high alpha envelope exploration. 

Given the great wing loading, industry standard low cost 4S 1000 mAh batteries (only 20C required for 20A current flow), chimp friendly construction and 4S accommodating stock motor and ESC, this little jet is a super package. 

$78 including a battery?  Awesome.

First flight on 4S:

The only real draw backs to the Mini Raptor are the inherent simplicity of a two servo elevon set-up and a CG that is still a bit forward with a solid battery pushed all the way back.  I wound up adding 50% up-subtrim and 125% up-elevator travel while in the air.  That flew about perfect, but the jet still ran out of flare on landing.  It would probably be perfect with a little foam trimmed-out to slide the battery even farther back.  Consider adjusting your neutral elevon position to a nose-up bias during construction.

An 850 mAh 4S might be no-mod answer, but I think the flight times and T:W are just right with a 4S 1000 mAh limited to 20 Amps current. 

It is a pretty small jet, but priced aggressively. 

For the F-22’s awesome flight character and the Mini’s low WCL and huge T:W, it wins Z8RC’s Most PNP Fun Under $100!

Overall:  A

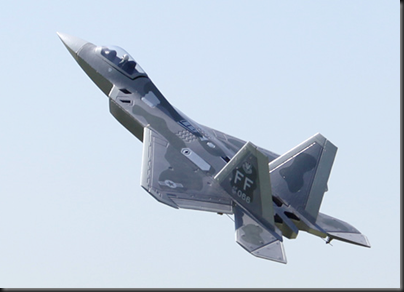
HighAlpha


Update 7/19/2012:  The Raptette functions perfectly with a 4S 1000 mAh (4 ESC beeps), and the slightly slimmer form factor of the $8 Sky LiPo battery allows a more aft position and gives a little better balance than the 3S 1300 mAh.

Rather than chance blowing the 20A ESC, I tested the 4S battery with the throttle in End Point Adjustment mode.  Starting at 50% upper half stick travel set, I put the throttle up to the firewall and slowly incremented the EPA to 69%, where the Amp draw showed 20.5 Amps and 307 Watts.

Running up the plane to the new full throttle (69% EPA) revealed a Thrust:Weight ratio well above 1:1 (400W per pound).   At 15A average throttle, a 1000 mAh 4S gives 4 minutes of flight time, so the numbers look great. 

Flight test tomorrow, winds permitting.

Original review follows:


OVERVIEW

$69.  What more is there?

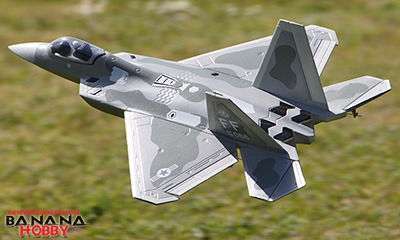
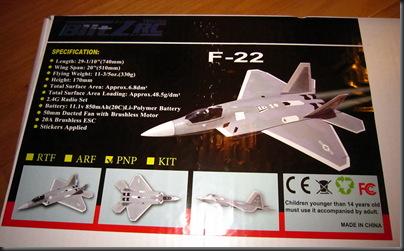
bh F-22Banana Hobby’s Baby Raptor

SPECS
- Wingspan: 510mm (20 in)
- Length: 740mm (29 in)
- Flying Weight: 330g (11.6 oz)
- Drive System: Ducted Fan 50mm, 5-blades
- Servo: 2X 8g high speed micro servos
- Speed Controller: 20 Amp Brushless Speed Control

FEATURES
- Linked elevons
- Construction: EPO foam
- Motor: Brushless EDF
- Servos: Two as elevons
- Landing Gear: None
- 5 minute assembly time
- Magnetic battery hatch (canopy)
- PNP

REQUIRES
- Radio: 3 Channel
- Battery: 11.1V 850mAh LiPo

ON THE GROUND

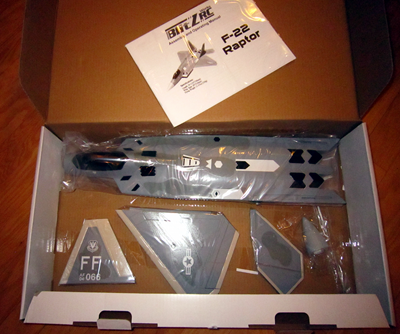
UNBOXING
The quality of this kit is very high for the money. 
box
unbox
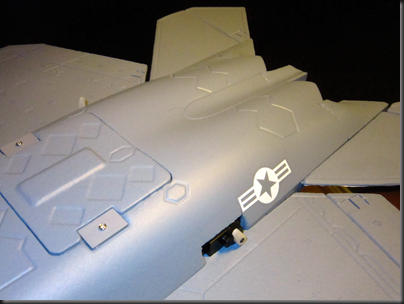
The packaging looks like Sky Angel.  So does the fan, ESC, and EPO foam.
 
Unlike models that need one, this jet actually has a complete manual with decent pictures.  I flipped through it after I built most of the jet.

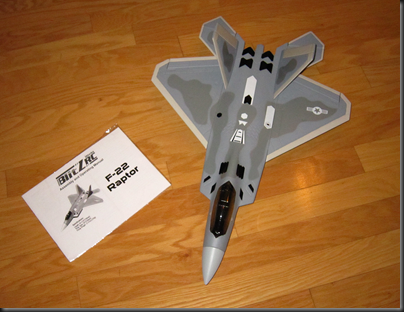
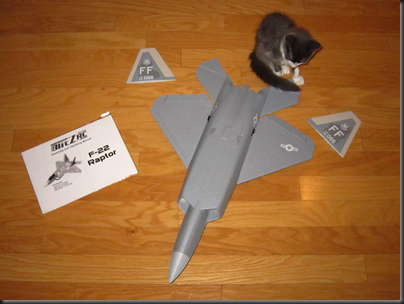
APPEARANCE / FIT N FINISH 
The baby Raptor goes together in less than 5 minutes. 
 
I haven’t seen EPO this smooth and strong and thin.  Very nicely done!  Puts other micros to shame at 1/3rd to 1/2 the price of some.
  topbottom

BUILD QUALITY/SETUP
Airframe quality is superb at this price point.  The little bugger appears to be very tough indeed.

bottomdetail

Servos are the usual junk, but other Sky Angel models have proven to be very reliable in the electronic component department.

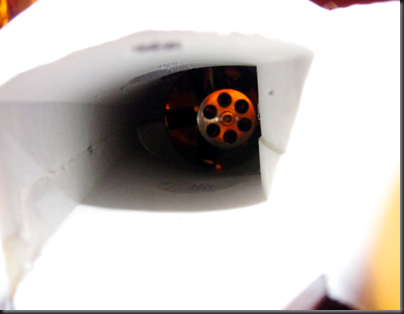
The fan is a good size for a micro/mini at 50mm with a 5-blade impeller, and the ESC is surprisingly chunky at 20 Amps.  All in all, a gorgeous little midget.

motor

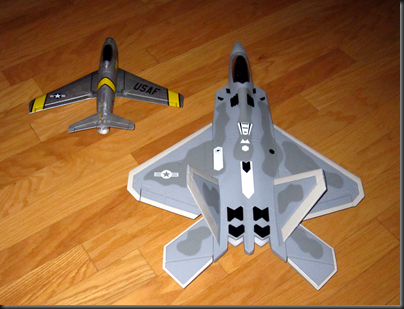
The mini F-22 is a lot more airplane for the money than traditional micros.   Like all F-22’s, the plane has copious wing area.

compare

ISSUES
None.

IN THE AIR

BLUF
A great little flier without enough push on 3S.  4S trials soon.   Maiden:
 

START/TAXI/TAKEOFF
With no landing gear, the only way to launch the mini Raptor is by hand.  I didn’t feel a lot of push on run-up, so I decided to use the discus method, where you hold the bird by its wingtip and start spinning like an Olympic athlete about to launch a solid iron frisbee. 
 
It was a good thing I did, because even with my best heave, the Raptor settled back down like a apple seeking Newtown’s gargantuan cranium.  Once I coaxed it to a mostly skyward vector, I was able to get enough altitude to trim out the elevons.  I made the possible mistake of using a 1300 mAh 3S, because I knew from the similar Sky Angel MiG-15 that flight time would be an issue using the recommended 850 mAh, and even a 1000 mAh is worth maybe 4 minutes. 

I rushed the 5 minute mini build and didn’t install a telemetry wire from the ESC power lines to a Hitec 6 Lite Receiver, so I only had servo voltage on the telemetry readout.  Bummer, cause I wound up tagging the LVC, not expecting a 1300 to quit so soon.  I figured the worst that could happen was a grass landing—which was the best that can happen too.

The Banana Hobby website needs to re-write the standard “10 minute flight times” bullet on their 50mm EDF series.  My old, decrepit E-Flight (=crap battery) 1300 lasted 4:50 to LVC dead stick.  A good 850 mAh 3S (the recommended battery) doesn’t stand a chance of lasting 5 mins, let alone 10.

I’m going to try a 4S 1000mAh next, I hope takeoff is a lot less exciting. 

GENERAL CONTROL
With the 1300 mAh 3S, the tiny spawn of Raptor flew solidly nose heavy.  I knew it was on the nose heavy side, but I couldn’t shove the battery back any farther without melting some foam.  I wish I had balanced the plane a little better in retrospect.
 
The plane flew great once dialed-in.
The mini Raptor is fairly quick flat out, which was a little it surprising given its wimpy static push.
 
BALANCE & AEROBATICS
Other than the need for one or two more clicks of up-elevator trim than the radio had to give, and maybe 10-15 aileron clicks to level the wings, the Raptor flew very nicely.  The out of trim setup was likely my fault for trying to get the Raptor up quickly today.  Be sure to level all the aileron and elevator surfaces perfectly, and maybe add a touch of symmetrical up-elevator at the neutral trim setting.
 
There was plenty of throw.  I was happy I actually glanced at the manual to determine if the aileron or the elevator should take the far hole in each elevon servo’s control horn.  This is the only real question (other than CG point) I had during the build.  The manual is silent on the decision, but in the back it shows the elevator requiring more movement than the ailerons, so I gave the far hole on the servo arm to the elevator pushrods.  That was the right choice.
 
Rolls were coupled in typical elevon fashion, and the plane was too weak to loop.  Overall aerobatic prowess is low on 3S; limited to fast rolls on high rates.
 
POWER SYSTEM
Thrust – unmeasured on the static stand, but clearly weak on 3S. 

The fan came nicely balanced. 

A good 1300 mAh 3S should last about 6 minutes. The E-Flite 1300 I used for the maiden was old and low end of the performance spectrum even when it was new. 

If I had trimmed a little foam to get the battery far enough back for a proper CG, I think the jet would have climbed better, instead of staining to lift the nose at half speed or less. 

I set up my rates like this for the maiden:

     High – 100% Aileron/Elevator, 55% Expo
     Medium – 80%
Aileron/Elevator, 55% Expo
     Low – 60%
Aileron/Elevator, 55% Expo

I felt the jet was still a little touchy in roll on Low, but without enough Elevator to flare out the landing given the forward CG.

ADVANCED HANDLING CHARACTERISTICS
Not much to see here.  My forward CG precluded solid high alpha, but the plane seemed eager and stable to jack the nose up, like a good F-22 should. 
 
I think a 1000 mAh 4S (I need to order one), placed far enough back, will be the ticket.
 
No rudder is a high alpha handicap.   I will probably add mix like I my rudder-less MiG-15, where the rudder stick only lifts the inboard aileron (in this case, elevon) to create little drag differential to synthetically replicate a rudder’s yaw control.

APPROACH & LANDING
The “approach” was an SFO pattern with a rapidly dying battery.  Once the motor sagged, I switched to a straight-ahead grasser.  No damage, easy enough, and will be better once I get the throws and balance iterated.

IN-FLIGHT ISSUES
CG: heavy nose.

OVERALL
F-22s seem to fly very well at RC scales, all the way down to micro.  High alpha is very stable, as is the entire flight envelope for that matter. The stealthy rake of the vertical stabs effectively adds dihedral.  “Needs a computer to fly” …Not!  

The Banana Hobby product page says:
 
  • Perfect for first time flying EDF jets
  • It may be easier to fly than propeller planes

    Even given the inherent stability of F-22 EDFs, I beg to differ.  The small scale of the airplane makes it harder to trim out, even though it is very stable as far as micros go.  The lack of Thrust:Weight on 3S is fairly challenging to coax along, especially upon launch. 

    While it is true that the F-22 is a terrific high alpha jet, the big wing can create a drag hole that is tough to power-out of unless you carefully trade AOA for kinetic while lots of battery is available, or sacrifice altitude.  Get it wrong and the jet will settle lower and lower even with the nose up high, and become even harder to recover until it feels for Earth or stalls completely.

    GRADES

    Appearance: A+
    Beautiful Micro.  EPO, so the looks might last a while.

    Aerodynamics: B+
    Very stable + lots of throw = fun.  F-22 quality flight.  Small.

    Power System: D+ on 3S, A on 4S
    Low T:W. Few-minute flight times w/recommended battery.

    Build Quality/Durability: A-
    Super simple.  EPO.  Yay!  

    Value:  B- on 3S, A+ on 4S
    60% less than junk Styrofoam micros.  Most fun you can have under $100.
     
    Overall Grade:  A
    Excellent power, wing loading and high alpha on 4S (only).  Limited by simple elevons and slightly forward batt position.

  • Tuesday, July 17, 2012

    BlitzRCWorks G4 Quad Charger / Thunder T6 Multi Charger

    BlitzRCWorks G4 Quad Charger / Thunder T6 Multi Charger

    Update:  My Common Sense RC 250W PSU has two sets of outputs (see photo below).  The set I had hooked up died cold after only a week or two of moderate use.    I am currently running on the second set with low expectations.  Avoid. 

    Note: The defective Common Sense RC PSU is not related to the BlitzRCWorks G4 Quad Charger itself.


    Back in January, I reviewed two inexpensive, expensive battery chargers.   I guess that means medium priced.

    Quick update:  The Onyx became unusable, routinely beeping to a halt with a "Balance Error" regardless of the battery's actual condition.  I've moved it to AVOID.

    This charger is more in the expensive class, closer to a power-user option:  the BlitzRCWorks G4 / Thunder T6 (from
    bananahobby.com/hobbypartz.com respectively).  There are a few misc differences between distributors, so look at the pics and video provided by all of them very carefully.  For example, the G4 and T6 differ in the amount of heat-sink built-into the front and back edge of the case, the G4 apparently has a deeper sink.  Also, the G4 has JST format balance lead connectors, while the T6 uses open pins which is more flexible but can be hooked up improperly.  The basic charger is probably sold under a few other names on other websites, so shop around and shop careful. 

    I'll just call it the G4 from here.

    SPECS
    - Input Voltage Range: DC 12 - 15 Volts
    - Power Supply Unit: Not included
    - Total charging power: 200W (50W each channel)
    - Max Discharge Power 20W (5W each channel)
    - Max charge current: 20A (5A each channel)
    - LiPo or Li-ion Cell Count: 1-15 cells
    - Pb Battery Voltage: 2 – 20V

    FEATURES
    - Four, independent battery chargers
    - Modes: Charge, Balance Charge, Fast Charge
    - Solid aluminum casing with integral heat-sink
    - Includes Deans connectors and a balancer variety pack
    - Safety:
    -- Delta-peak sensitivity
    -- Capacity limit
    -- Temperature limit
    -- Processing time limit
    -- Input power monitor w/programmable voltage shutdown
    -- Automatic cooling fan

    Although the G4 only costs about $80 (or $64 after the coupon codes posted on this site), the price is a little deceiving because it does not come with a power supply.  That's actually ok if you don't mind using a car-battery; it can hook up to a 12-15V source right out of the box .

    For those of us that want to charge without a hood ornament poking our ribs, you'll need to add a AC-->DC Power Supply Unit.  A good PSU will add another $40 or so, about $120 with plenty of juice to overcome transfer inefficiencies, look for at least a 240 Watt unit to power the G4 at full bore.


    Hobbypartz 14V,
    350W PSU
    ($40)

    Common Sense RC's 15V,
    250W PSU
    ($80)

    If you are good with computers and a soldering iron, you can convert a 250W+ ATX PSU as a moderate soldering project, but to me the price difference isn't worth the hassle.

    You'll also need to add maybe $30-50 in balance boards and/or connectors to suit your preferred battery style.  So all told, this thing will run you about $150 fully functional.  $150??  For that you can buy 2.5 of the excellent little Dynamite Passports--the model that won the January H2H.  True.  But the G4 can do more than 4x the work of one Passport.

    The G4 has four, fully independent charging channels, each providing up to 50W of charging power (the same as a Dynamite Passport's single channel), or 200W simultaneously.

    Ok, so this time, in English.  The G4 can fully charge:

    - Four, 4400 mAh 6S batteries in 1 hour, 50 minutes
    - Four, 3000 mAh 4S batteries in 48 minutes
    - Four, 2200 mAh 4S batteries in 36 minutes

    - Four, 2200 mAh 3S batteries in 27 minutes

    A rare glimpse inside the Z8RC hardened steel
    charging vault, where several hundred LiPo batteries dwell in cold,
    fireproof isolation from the rest of God's Universe

    That's what is advertised.  In reality the G4 performs a little better, peaking close to 55W per channel.  It might help that I bought a 15 Volt, 16.5 Amp, 250 Watt, PSU.  The higher voltage should provide a little more efficient power transfer.

    Even cooler, you can charge some combination of the above at the same time.  And if you have several copies of the same type of battery, you can add a parallel-capable balance board to one or all of the four channels for about $10/each. 

    PB-XH-EC5

    Two boards similar to this one are shown on the second shelf of the charging vault, in the photo above

    With a balance board like that, you can charge up to six (similar type and capacity) batteries on each of the four channels.  So using bullet #3 above as an example, you could charge six 2200 mAh 3S batteries in 2 hours, 40 minutes only using one of you four available 50W channels.

    That's a whole lotta charging for $150 if you ask me.

    True, there are faster individual channel chargers that could get you back into the air quicker from underneath the hood of your car.  With only 50W available to any single battery, field charging is probably not the G4's forte.  The G4 provides great value when charging in quantity.

    The G4 also has a ton of safety features and mid course checks, to help keep the Fire Dept away.  Two of the four channels have temperature sensor sockets associated with them, with a programmable temperature stop if a battery begins to get warm.  The charger also checks the cell count before starting, so it won't let you select the wrong voltage.  It lets you set separate clock time and battery capacity timeouts, and it halts current in the event of any line break.

    The hobbypartz video series does a nice job walking through some of the menus:

    Better still, the G4's digital menu system is almost as convenient as the Passport's hassle free plug-n-charge operation.

    The G4's build quality is heavy, industrial grade; really nice. The CSRC 250W PSU sports a similar heavy aluminum nearly matching case, and both have integral heat-sinks running around the perimeter.

    The menu system, while still susceptible to an illogical quirk or two, is a breath of fresh air compared to Duratrax Oynx and is mostly straightforward. 

    As nice as the charger is, the G4 will appeal primarily to the charging demographic that prefers to haul a lot of batteries to the strip rather than recharge one or two in the field.  Or, to those who have a wide variety of battery types to reload.  I’m in both of those camps, so I really like the idea of getting four fully independent channels that charge in parallel, even each only churns at an average pace.

    For someone like a focused T-Rex 600 flier on a budget, who needs to recharge one 6-cell 5000 mAh LiPo battery as fast as possible in the field, this is certainly not the fastest charger for the money.

    Issues?

    Mostly nitpicks:

    - It would be nice if the G4 remembered your last charging mode after a restart instead of needing to put all four channels back into Balance mode.
    - It is unclear what the “LiPo Charge” mode does, as opposed to the “LiPo Balance” mode.  Both modes require a balance connector hooked up in order to operate.
    - Pressing the “Start” button to change the flashing input field is not intuitive.  You have to press and hold “Start” to actually start.
    - After pressing and holding “Start” the charger auto detects the cell count, shows the user-selected cell count vs the auto detected cell count, and then asks you to confirm a start.  To save an additional button press to start every charge, why not ask for confirmation only when the user-selected number of cells does not match the number of cells detected?

    Overall, it's great to see a reasonably streamlined, menu-driven charging experience with plenty of power to reboot the airplane collection. 

    Highly recommended.

    Overall:  A-
    Fast if you have a lot of batteries to charge in parallel.  Needs pricey PSU.  Good safety checks.  Great configurability and charging power for the $.

    Wednesday, July 4, 2012

    Value Head2Head - FMS vs Horizon Hobby


    H2H
    As some know and others are soon to figure out, I generally don't like Horizon Hobby's lousy value proposition.  The reason is not that I dislike the company in general, and I don't like them because they are an unethical organization.  They rip off beginners as a primary business model, they exploit foreign workers,  they invade forums pretending to be customers, and they pay for glowing "reviews" (= legal fraud) because they know they can't get them honestly.  That's all ancillary to me.  I grade products objectively regardless of the low quality of the people who form the company that makes it.  The reason I don't like Horizon Hobby's value proposition because they don't have one.  They extract value from the RC community, they do not contribute value.  I don't like leaches.

    Why do I grade HH products fairly when the company is a blemish on the RC community?  Because I'm attempting to provide a service for others who may or may not agree with me.

    So let's do a quick value comparison and see if there is some objective value difference between has-been  Horizon and a new leader like FMS.  We know that both companies mark-up products they buy in China.  Which company is attempting to bring the value of hard working China to you, and which one is working to steal it for themselves?  You tell me.

    Attribute
    FMS
    Horizon Hobby
    Winner
    Margin
    Model
    ASK 23 Motor Glider
    ASK 21 Glider
    -
    -
    Wing Span
    91"
    34"
    FMS
    267%
    Scale
    38.5 oz
    2.5 oz
    FMS
    1560%
    Motor
    4018
    None Provided
    FMS
    Infinite
    WCL
    4.9
    6
    FMS
    18%
    Street Price
    $103
    $120
    FMS
    16%
    $/lb
    $42.26
    $768.00
    FMS
    1817%

    Those who work in the aerospace industry will tell you that aircraft are bought and sold by the pound.

    Winner: FMS
    Margin: 18x value

    Z8RC Open Discussion

    Feedback | Suggestions | Questions

    Please note, reader comments do not appear immediately after hitting submit.

    I like to fly:

    Top 10 This Week

    Top 10 This Month