

Flying doesn't get any more relaxing than steering this fantastic little floater around your neighborhood. Fly it in a few yards space (as in, lawns) and it coasts past starry-eyed children in slow motion--completely under control with full back stick at 1/2 throttle. Taxiing is easier than most micros, with a true steerable tail wheel and double-wide mains. The included, HobbyZone brand, 150mAh single cell LiPo battery is about 30% longer than my Turnigy 160mAh (AVOID) and it lasts about twice as long.
I'm not going to rave on and on about the Champ,which is the first micro I've seen deliver perfect manners in a small package, but I could. Just buy it and fly it from your driveway! The Champ sells for $90 in RTF form. I wish it was available for around $70 as a BNF, but the beefy foam quality--at least twice as solid as most micros--and dreamy aerodynamics make this puppy a steal even with a low end RTF radio in the box.

For even more stability and long term strength and, most of all, scale looks, on my way to the hobby store checkout counter I picked up a thin carbon fiber rod to add the black wing struts (shown: running from the main rear gear fairing attach point to mid-wing--ok--I shoulda painted them). If you do this strut mod, keep the carbon wires thin so weight stays nice and low, the wing is reasonably strong already. Press the rod 1/16" into the foam and secure each attach point with a small dot of Gorilla Glue or Foam Safe CA.
Hobbyzone Champ, you get an easy: A+!
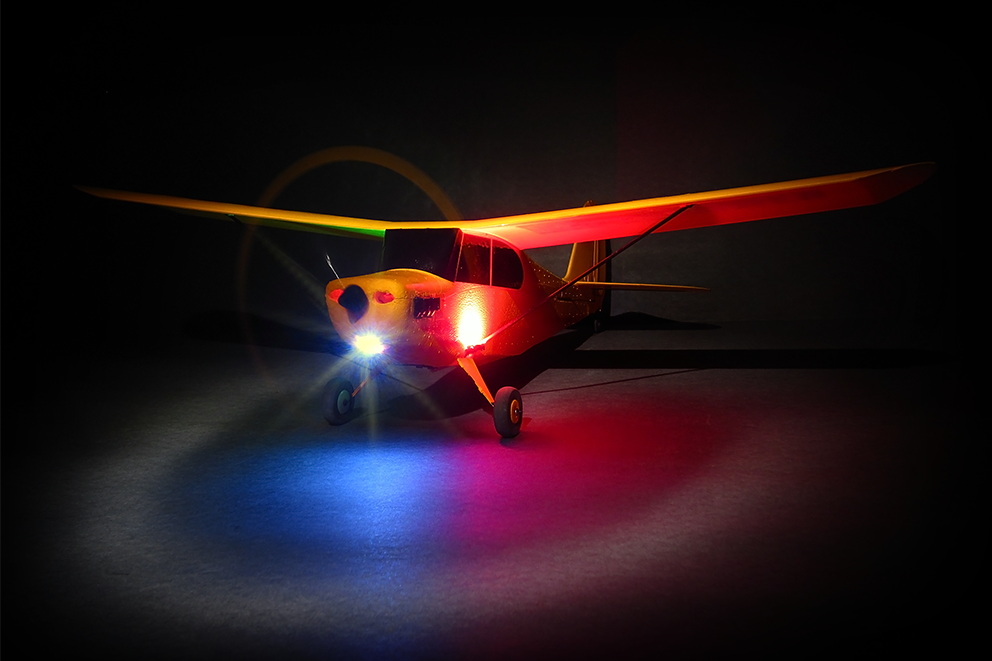
Addendum: Champ LED Mod

Landing and Nav:
http://www.radioshack.com/search/index.jsp?kwCatId=&kw=4-pin%20led&origkw=4-pin%20led&sr=1
Beacon:
http://www.radioshack.com/product/index.jsp?productId=2117837
I tapped the power lines running to the battery connector by melting a little rubber off of each wire, then soldering a new wire to each lead. I wired each LED in parallel, connecting each one to the new wires i added to tap power from the battery. The 4-pin LEDs are extremely bright, make sure they illuminate teh airplane instead of pointing outward horizontally, or they may bother you while flying the plane. i angled the Landing Light down at a 45 degree angle, directly on top of the Champ's radiator mock-up. The white 4-pin LED Landing Light illuminates 3-5 feet in front of the plane for night landings. You may wish to move the red and green Nav Lights out to the wing tips for better spacial definition of the wings at night.
The Champ has plenty of power to lift the lights which only weigh a few grams each, and they look great at night!


Engine Cylinder Mod:
Today I added four cylinder heads, two on each side of the cowling, using the ends of four large nylon zip-ties painted gloss black. I know, I know, its really a Cub thing.


